Tag: cloudflare
-
GTFS
As iRail’s servers go down once in a while (and contain some legacy files, making it a bit messy), I decided to back up and host the GTFS feeds of Belgian Railway (NMBS), and the 3 Belgian bus companies (De Lijn, TEC and MIVB) at gtfs.flatturtle.cloud. Every night, around 3am (CET), the GTFS files are…
-

Taking the Airbus to the IKEA Cloud
We do have some (smaller) cloud (Scaleway) and datacenter players (Leaseweb, could use some innovation) and some inbetween (OVH, Hetzner)… But none are really a true cloud provider with serverless, all the storage stuff, etc. Evroc is trying just that — being a real competitor to GCP and AWS — but that’ll need a lot…
-
killwarp
Is your company forcing Cloudflare Warp on you, and are you running on a Mac (with sudo access)? It probably sucks, spies on you, does MitM attacks, breaks most video conferencing tools, and is generally not very stable… Also… Zero trust! Add this function to your .bashrc or .zshrc (whichever shell you’re using*): Open a…
-
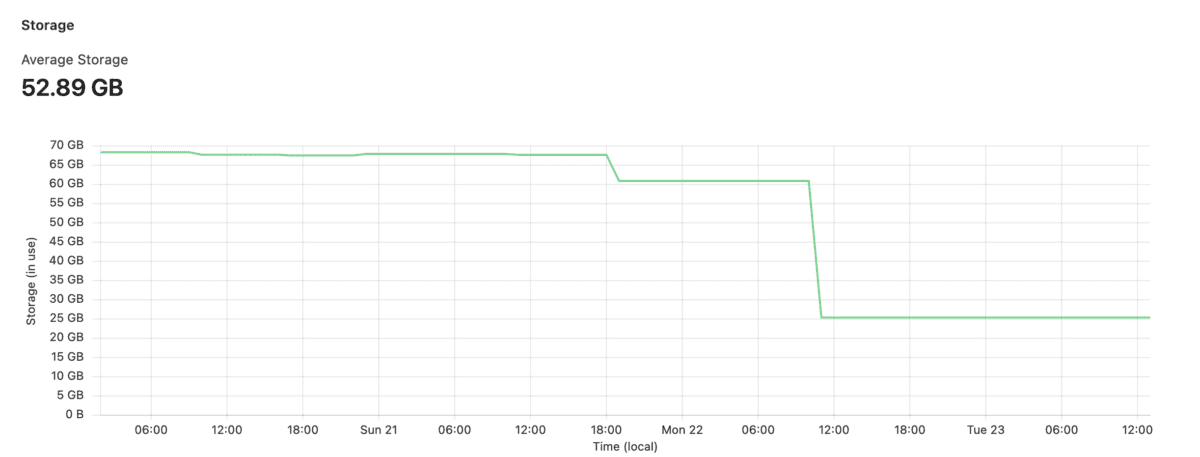
Keeping Mastodon storage in check
For my Mastodon instance, I use Cloudflare R2; mainly for two reasons: While I didn’t care much about storage any more, I still wanted to make sure it was kept in check, also for two reasons: I run my Mastodon in a Docker instance, so your commands may vary (basically tootctl X Y is what…
-
Mastodon server: R2
This is a very short post because to be honest, I didn’t figure much out myself. My uploads/static files are now saved in R2 under its own URL (part of my enterprise zone) so that my normal caching rules and other settings are applied. Add these to your application.env file: The token/API key is a…
-
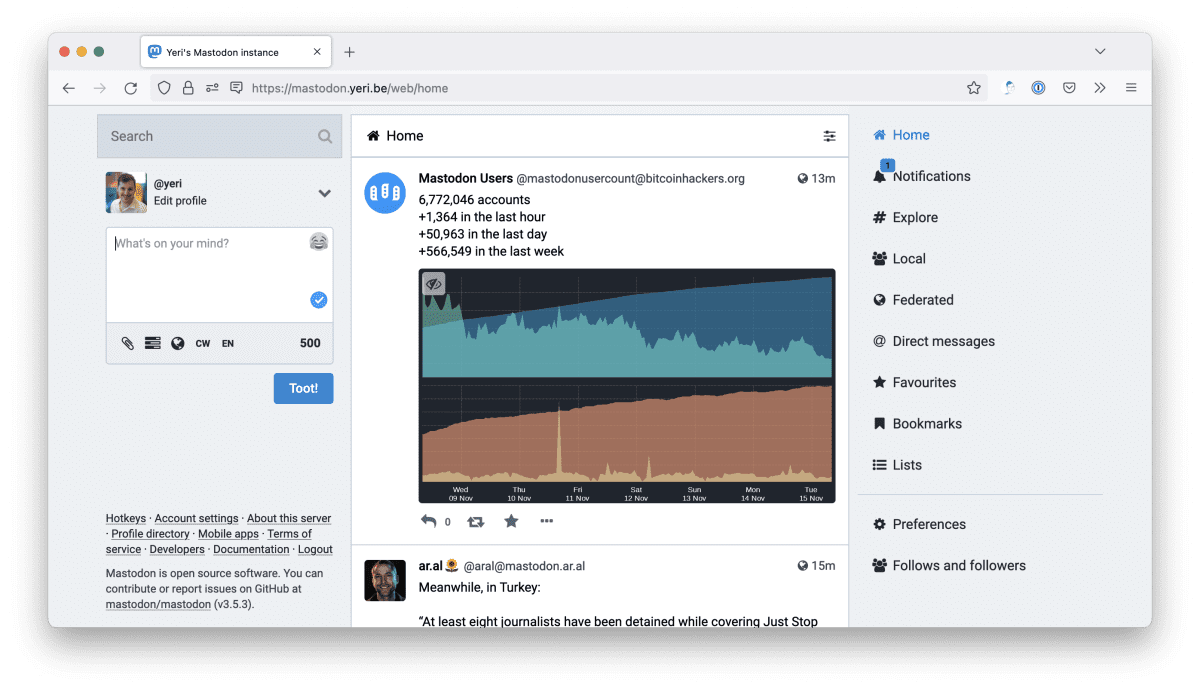
Using Mastodon with Cloudflare
If you’re using Mastodon with Cloudflare CDN/protection and minify turned on, you’ll notice the site may look broken (after a few visits, when hitting Cloudflare cache). And you’ll notice errors in the webdev tools similar to Failed to find a valid digest in the ‘integrity’ attribute, with computed SHA-256 integrity: Basically, the sha256 hash doesn’t…
-
Remote desktop and Wake-on-LAN
Shan uses her iPad a lot, but a lot of the more serious (interior design) work needs to happen on AutoCAD or Photoshop. That is just not going to work on an iPad. When we’re travelling (read: holiday) she’s carrying an old Lenovo ThinkPad 13 (great device!) just “in case” she needs to open AutoCAD…