Categories
Linux Software Virtualisation

Feed2Toot

Started looking into a service to auto-post from this blog onto my Mastodon feed. Feed2Toot fit the bill perfectly.

I wanted to run the whole thing from a Docker container, though, so I’ll quickly write a how-to.

This whole thing runs from a Raspberry Pi, as root. No k8s or k3s for me. The path I use is /root/git/feed2toot/, so be sure to modify that to whatever you’re using.

First off, get your credentials for the app. You can either install the Feed2Toot package on a system (i.e. throwaway VM, to keep it clean), or use the Docker container below, but add RUN apk add bash and change the last line to CMD ["bash"] and then chroot into it via docker exec -it feed2toot bash.

This will generate two files (feed2toot_clientcred.txt and feed2toot_usercred.txt). Be sure to save these.

You can also try to run Feed2Toot at least once to make sure it’s working and to fine-tune your ini file. This is mine:

[mastodon]
instance_url=https://mastodon.yeri.be
; Here you need the two files created by register_feed2toot_app
user_credentials=/etc/feed2toot/feed2toot_usercred.txt
client_credentials=/etc/feed2toot/feed2toot_clientcred.txt
; Default visibility is public, but you can override it:
; toot_visibility=unlisted

[cache]
cachefile=/feed2toot/feed2toot.db
cache_limit=10000

[lock]
lock_file=/var/lock/feed2toot.lock
lock_timeout=3600

[rss]
uri=https://yeri.be/feed
; uri_list=/feed2toot/rsslist.txt
toot={title} {link}
; toot_max_len=500
title_pattern=Open Source
title_pattern_case_sensitive=true
no_uri_pattern_no_global_pattern=true
; ignore_ssl=false

[hashtaglist]
; several_words_hashtags_list=/feed2toot/hashtags.txt
; no_tags_in_toot=false

[feedparser]
; accept_bozo_exceptions=true

[media]
; custom=/var/lib/feed2toot/media/logo.png

I have three other files to make this work, first off Dockerfile:

FROM python:3.6-alpine
RUN pip3 install feed2toot && mkdir -p /etc/feed2toot/
COPY feed2toot.ini feed2toot_clientcred.txt feed2toot_usercred.txt /etc/feed2toot/
VOLUME /feed2toot/
CMD ["feed2toot", "-c", "/etc/feed2toot/feed2toot.ini"]

The script I run to build the container (start.sh):

#!/bin/bash
git pull

BASEIMAGE=`cat Dockerfile | grep FROM | awk '{print $2}'`
docker pull $BASEIMAGE
docker stop feed2toot
docker rm feed2toot
docker build -t feed2toot .
./run.sh

And finally, the script to run the container every so often (run.sh):

#!/bin/bash
docker run -d --rm -v /srv/mastodon/feed2toot/:/feed2toot/ --name feed2toot feed2toot

This will save the database file under /srv/mastodon/, to preserve states across rebuilds.

Note that once Feed2Toot runs, it’ll exit, and the container will be stopped. So it does not automatically run all the time.

So, you’ll want to run this every so often. You can add a file to /etc/cron.d/ to run it, for example, every six hours:

#
# cron-jobs for feed2toot
#

MAILTO=root

0 */6 * * *		root	if [ -x /root/git/feed2toot/run.sh ]; then /root/git/feed2toot/run.sh >/dev/null; fi

That’s it. Should do the trick. It’ll now post stuff from your RSS feed onto your timeline.

Oh, and Jeroen has a good post about Mastodon.

Categories
Linux Misc Networking Software Virtualisation

Smokeping.eu

I’ve revamped my Smokeping infra a bit since 2020.

First off, starting to use the smokeping.eu1 domain that Bianco got 10 or so years ago instead of using weird URLs under superuser.one domain.

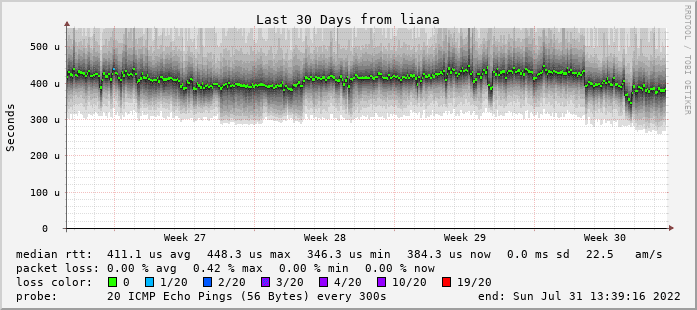
It’s running on four nodes as we speak:

This is achieved using Smokeping in a docker container, Cloudflare tunnel and Cloudflare CDN/DNS.

1 Doesn't point at anything at the moment. To do later.
Categories
Apple Linux Networking Software Virtualisation

Box — Docker shell server

A couple of months ago I had the great idea to set up a shell server in Docker. Simply because my docker skillz were quite rusty and a shell server was something I actually genuinely needed.

Shell servers… so 2005. I remember in the good old IRC days people asking for (free) shell servers to run their eggdrop and stuff. OMG am I getting old? Anyhow…

I ssh quite often. I manage quite a few servers (~15?) and routers that require me to login and do some random stuff. I also work on a laptop quite often and that means closing the lid and moving around.

First of all, mosh is amazing and allows you to stay connected via ssh, even with crappy (airport/hotel) internet as well as moving around networks — that solves half the problem. If you are not using it, start using it now!

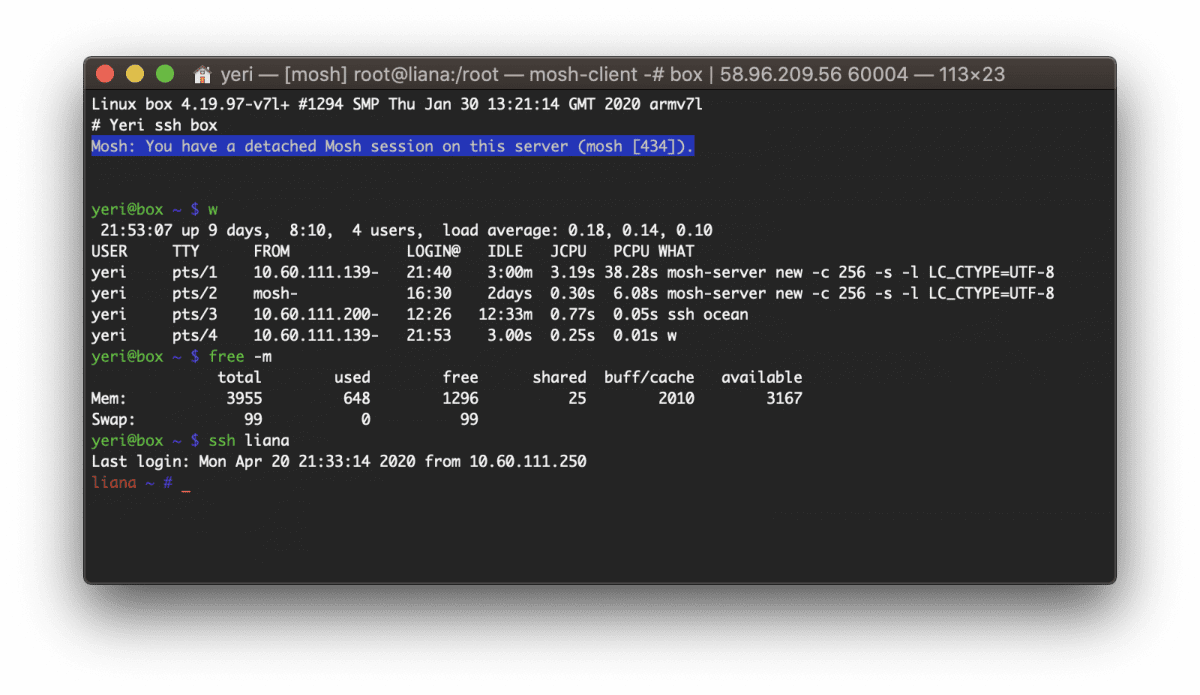
Second, during my datacenter technician days at Google we used to have a “jump server” — a shell server that allowed us to bridge the corporate network and ssh into prod machines. Doubt that’s still used nowadays, but the idea stuck. I wanted something similar to ssh from, wherever I was, and easily connect to my servers. And as the network the shell server is running on is stable, I only need to use mosh to the shell server. Thereafter, the connection very rarely dies.

And I guess, third, I recently purchased an iPad Pro and I really need to have my local “dev” environment with my git repo that I edit quite frequently but iPadOS isn’t really your average computer, and doesn’t even have a proper terminal. This is my experiment to make iPadOS work as a main computer when on the move.

Enter box — Docker shell server

I’ve copied over the files I use to this example repo, and added some comments. Mind you that this repo acts as a proof of concept and isn’t kept up to date, as I have my own private repo — but this should give you a good idea on how to set up your own shell server with Docker.

start.sh — this is a simple script that I execute when I first run or need to update the container. I execute the same file on two different servers: Liana, my Raspberry Pi at home and Ocean, my server in Amsterdam.

zsh.sh — this installs what I care about for zsh. This could be part of the Dockerfile but for some reason I separated it. ¯\_(ツ)_/¯

git.sh — this clones my Git repos so I can edit and commit stuff from the shell server.

run.sh — this file is launched by Dockerfile at the end and executes what matters: the ssh daemon. It also adds a Wireguard route and executes the scripts above.

Dockerfile — this installs everything I need and configures the whole thing. I’ve added tons of comments that should get you going.

I am also cloning misc and homefiles as submodules in files/ — but you should change this to something that works for you. See the Dockerfile for more info.

Categories
Linux Networking Software Virtualisation

Updated @Flightradar24 Ansible cookbook

I had to wait a little while for the ARMv7 version for my EfikaMX devices, but they finally had time to compile it. Yay!

The updated cookbooks are on Github.

Changes (commits):

  • Better key management
  • fr24feed.ini
  • No more separate dump1090 launch
  • newest fr24 version

Download links for Linux & RPi.

Categories
Hardware Linux Networking Software Virtualisation www

Theme

I had the same theme for over four years. I’ve made quite a few custom css and PHP edits myself, and it had been outdated for ages… But it served me well.

theme-2011

However, it’s now time for something new.

theme-2015

As always, as minimalistic as possible.

On a side note, this blog has been moved from vm1 (and one before that) a virtual machine running on a dual Xeon 3070 (2.66Ghz) at Databarn to Akama, a VM on an 8 core Xeon E3-1230 (3.2Ghz) at Leaseweb.

I’ve also correctly repaired IPv6 on this blog. Apparently nginx never and/or stopped correctly listening to IPv6 (suddenly my Android devices displayed errors on this page, Chrome & Firefox on OS X seemed to fall back to IPv4 instantly… Not sure how long it was broken, but it’s back).

Note to self:

listen          yeri.be:443;
server_name     yeri.be;

Does not work with IPv6, it has to be

listen          [::]:443;
server_name     yeri.be;